
Six Easy Ways to Foster an Accessible and Inclusive Music History Classroom
Many music educators today grapple with this daunting question: How do we create and foster accessible teaching and learning experiences? By “accessible” we are referring to approaches that address learner variability by providing multiple opportunities and options for those with sensory, mobility, cognitive, and learning differences. A good place to start is with the principles of Universal Design for Learning (UDL), a framework that aims to maximize learning for all students. Indeed, UDL“provides a blueprint for creating instructional goals, methods, materials, and assessments that work for everyone—not a single one-size-fits all solution but rather flexible approaches that can be customized and adjusted for individual needs” (CAST, 2012).
UDL provides three central principles for tackling the question of designing for learner variability. First: Instructors should provide multiple means of representation, or, in other words, present content and information in various formats. Second, the pedagogy should provide multiple means of action and demonstration of learning, or allow learners to express what they know in different ways. And finally, instructors should provide multiple means of engagement, which essentially means that students should be offered options that will stimulate and motivate them (CAST, 2012). Ultimately, the accessible and inclusive classroom can be characterized as differentiated, flexible, and empowering.
Step 1: Start with the syllabus
Effective inclusive design reduces physical, psychological, and emotional barriers to learning. However, despite our best efforts as educators to minimize all barriers through inclusive design approaches, there may still be individual accommodations that need to be made in our courses depending on the context and circumstances. Traditionally and all too often, accommodation statements are buried towards the end of the syllabus for a given course, leading students to feel they are an afterthought or a cursory concern for the instructor. Instead, promote the possibility for success across your classroom population by placing a statement of inclusion and accommodation requests at the top of your syllabus. Also, in the interest of promoting multiple means of representation, present a video announcement on your Learning Management System (LMS) as part of your introductory materials. (More on accessibility and video content, see below.) If you create “learning agreements” with your students on the first day of class, consider making accessibility an important part of these conversations. Begin by stating an openness to learning differences and by providing a diverse range of instructional goals, activities, and assignments, as this approach can often be the best way to set the tone of inclusion for your course.
Step 2: Make TEXT more accessible
Be it textbooks, online notes, transcripts, or powerpoint presentations, text is a prevalent part of the teaching and learning experience. Most screen readers, software used by blind and visually impaired computer users, enable access both to online and print text. Remember, though, that contrast is important when preparing slides. You should ensure that all visual materials contain enough contrast to be visible to everyone, including those with colour-blindness or other visual differences. Text formats should be flexible, allowing students to adjust for size and layout when possible. Scanned PDFs of articles and books often lack the flexibility that screen readers require. Another way to enhance the accessibility of your classroom is to allow students to download and manipulate notes as they see fit. Also, be sure to check with your institution’s LMS (Learning Management System, for example Blackboard, Desire2Learn, or Moodle) support team to ensure your texts are useable on multiple devices and in various formats (tablet, phone, and personal computer). Finally, consider developing descriptive elements and alternative text (alt text) for images and figures. Detailed prose explanations will allow all students to develop deeper understandings of the images you include. When you write an alt text, consider what a student would need if they couldn’t see the visual components at all. Include a clear description of the content and a sense for the function or the importance of that content. Check out this website for further guidelines.
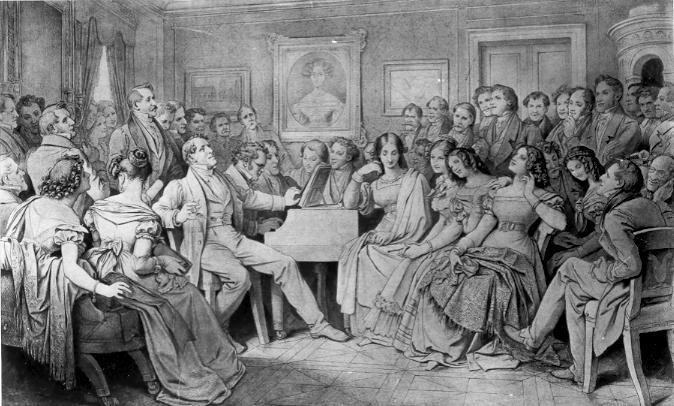
Example 1 Example of alt text for Moritz von Schwind’s drawing of a Schubertiade (1868)
Step 3: Make AUDIO more accessible
We are instructors of music. Sound is inherently an important part of what we do. So, what are some key tips for incorporating sound into the classroom that takes into consideration learner differences? First, ensure you’re using high-quality recordings that can allow for volume adjustment, playback options, and pausing. Second, be careful not to overwhelm students. Students on the autism spectrum might need to move around. Make it clear to students at the outset that it’s okay to move around the classroom as needed. Have stopping points, where appropriate, or provide structural cues of some kind, i.e. provide goal posts that break down larger formal structures. Third, provide tactile or visual alternatives. Link to sheet music or musical notation when appropriate. Inquire about the possibility of offering braille scores. Have supporting written materials available for download through your LMS or in a purchased textbook. And finally, make sure all audio files are downloadable, clearly labelled, and compatible across platforms (MP3 or MP4 files are the best).
Step 4: Think beyond music examples: Additional Uses for Audio
One of the greatest strengths of music classrooms is their ability to attract students interested in sound, and students are increasingly interested in creative expression when it comes to submitted materials. Don’t stop at musical examples. Consider podcasts, speeches, videos, and performances as a part of classroom materials. Record a lecture and pair it with visual slides on your LMS for students to consult later. Record an explanation or a play-by-play of a certain work that can be paired with a score. If your LMS allows it, provide recorded feedback on assignments. Create a class playlist on YouTube. (For more on how to find videos that honor copyright law use the Creative Commons Search Tool.)
Audio is also a compelling tool to incorporate into assignments. With the use of smartphones and laptops, students can create their own podcasts, perhaps even incorporating interviews with members of the community. Students can orally record arguments on a topic or create journal reflections. Audio can also serve as a means to craft, track, and reflect upon goals during the course. Most written assignments can be offered as oral assignments with a little tweaking of prompts and evaluation criteria.
Step 5: Make VIDEO more accessible
Videos are increasingly important to the music history classroom. Whether experienced through concert recordings, opera on film, or other multimedia formats, the visual element of performance can inform the aural element in unique ways. Whenever presenting audio material (and here’s another place to remind you of the Creative Commons search tool), there is a simple checklist to consider when taking into account learner differences. First, include captions and a transcript—also referred to in some instances as “described video”—for video materials. (For some handy DIY resources for closed captioning and transcription see here.) Be careful to test these for pacing—for example, captioning that runs too quickly can be difficult to digest. Try to ensure material is delivered at a moderate pace and that pauses are included. Keep in mind – closed captioning is excellent for many learners. For example, those who are learning a new language, listening in noisy spaces, or those who prefer to read along while listening will appreciate closed captioning. Just as with audio examples, video examples should allow students access to playback controls and be careful not to make your videos overly long. Recent research shows that students engage more with shorter videos and an optimal length of 6 minutes or less (Guo, 2013). If you’re interested in including opera videos with built-in subtitles, an excellent resource to consider is OperaVision, a consortium of European opera companies that provides video streams of its productions free of charge.
Example 2: Subtitled Version of Verdi’s La Traviata from OperaVision
Similar to audio, videos need not be limited to music examples. Instructors can use videos to conduct interviews with experts, create a course blog, or share multimedia presentations. Encourage students to record responses to course material using VINE, create mini-documentaries, remix existing videos, or record a teach-back session where they present concepts in their own words. And, in creating their own videos, ask students to incorporate their own closed captioning and accessibility elements. Turn the creation process into a space to engage the question of learning difference with your students.
Step 6: Consider ways to support Executive Functioning
Executive functioning is a skill present in everyday life. It includes those parts of the brain that manage logistics, execute tasks, and oversee day-to-day routines. These skills can be easily supported and developed in the classroom, benefiting a wide range of learners, including students with ADHD, second language learners, and (more broadly) first-year undergraduates and transfer students adapting to the demands of the university environment. The easiest way to support executive functioning is to establish clear expectations, classroom norms, and assessment criteria. This approach might include co-creating norms with your students to generate a shared language around expectations and values to collectively foster an inclusive teaching and learning environment. In terms of assessment and evaluation, a rubric (holistic or analytic) or checklist for assignments, a clear breakdown of materials, or a suggested timeline can help to support student focus and reflection. Give students the opportunity to be interactive when not in the classroom. Allow them to create or annotate notes together by setting up a classroom google doc or a discussion board. Insert check-in moments throughout the course through self-check quizzes. Be clear about expectations and give immediate feedback.
Overall, designing with difference in mind opens up opportunities for student engagement, and creates a flexible, empowering, inclusive classroom. Many of these approaches have been tried by ourselves or our colleagues, and students are excited by the opportunity to explore creative assignments and multiple means of demonstrating and expressing what they know. Indeed, inclusive design for learning can mean that students feel actively engaged in their education. It makes the lessons of music history more immediate and implicates students in their own learning process. The types of Instructional strategies and assessments included in this post also encourage students to think creatively and critically in their own mobilisation and transfer of knowledge. Creating this type of classroom environment makes music history more inclusive, engaging, and relevant for educators and learners alike.
HELPFUL SITES
- Universal Design for Learning in Higher Education: http://udloncampus.cast.org/home#.W0-UEdhKiCQ
- Accessible Online Learning Experiences: http://cel.uwaterloo.ca/honeycomb/accessible.html
- Popular Podcasts for Higher Education (iTunes Preview)
- http://aem.cast.org/ National Centre on Accessible Educational Materials
- Web Accessibility in Mind https://webaim.org/articles/design/textonly
- Web Content Accessibility Initiative:
https://www.w3.org/WAI/standards-guidelines/wcag/ - Closed Captioning Best Practices: http://main.wgbh.org/wgbh/pages/mag/services/captioning/faq/sugg-styles-conv-faq.html
- Magpie Caption Tool http://ncam.wgbh.org/invent_build/web_multimedia/tools-guidelines/magpie2helpcontents
- DIY Resources for Closed-Captioning and Transcription (including creating CC for YouTube videos) http://udloncampus.cast.org/wicket/resource/org.cast.cwm.xml.FileXmlDocumentSource/opt/tomcat-oncourse/content/downloads/DIY_Brief_Captioning.pdf
- AMS/SMT Bibliography to help navigate disability issues in the classroom:
https://musicdisabilitystudies.wordpress.com/pedagogy/ - Duke Accessible Syllabus website: https://sites.duke.edu/dukeaccessiblesyllabus/
- Michelle D. Jones, et al., “Roundtable: Accessible Music Pedagogy and Scholarship: Accommodations for Bodily Difference and Disability”: https://iu.mediaspace.kaltura.com/media/SEM2016-Session+4A/1_kh8whl7m

